.NET – Remoting
Software Development December 11th, 2006Remoting is basically an architecture available in the .NET framework for distributed objects. It is an alternative to web services, but with some key differences. The purpose of this article isn’t to compare the 2 methods for developing distributed applications, I’m assuming if you are reading this article you are at least familiar with what remoting is. I’m going to walk through an example using remoting, and hopefully at the end you will have a better understanding of how the process works. If you don’t want to go through the process of creating the solution and just want to see the example, you can download it here.
Before we get into an example, let’s take a minute and review how remoting works. Remoting is a way to allow software components to interact outside of their application domains, processes, and / or machines. One key point to make…while web services are cross platform, remoting requires that the client and server pieces both be in a .NET language. This can also be an advantage over web services if this is your environment anyway. You can use binary serialization, which will be less bloated than the SOAP protocol, therefore more efficient. There are also security implications to using remoting, but I won’t get into those in this article. Here is a good place to start to understand some of the security considerations you should keep in mind.
How does remoting work?
The basic concept behind remoting is that you use a transparent proxy object on the client to make calls to public functions on an object located on the server. When the client makes a call to the remote object, the proxy serializes the request and makes a call to the remoting service through the channel. Don’t worry if this seems like a lot of jargon right now, I’ll explain all this stuff in my example as we go. When the server gets the request, it deserializes it, locates the object, and invokes the method that the client requested. The results are then sent back to the client in the same way that the client made the request.
Example
I wanted to choose an example that was a little more complex than “Hello World”, but no so complex that anyone reading this would get bogged down by the details and not be able to see how remoting actually works. We’re going to build a remoting example that allows the server object to populate a menu and send it back to the clients. It’s probably not the most useful example in the world, but it will allow me to touch on all the points I want to make. OK….let’s get started.
Shared Library
The first part we’re going to work on is our shared library. In your solution, add a new class library project, I called mine RemoteSharedLib. I added 2 classes to this project, Menu.cs and LineItem.cs. Basically, we are going to have a few simple classes that both the client and the server will use, that way I can show you how this works with something other than simple data types. Here is what our classes will look like:
Menu.cs
using System;

using System.Collections.Generic;

using System.Text;
namespace RemoteSharedLib

{

    [Serializable()]

    public class Menu

    {

        /*-------------------------------------------------*/

        private List _lineItems;

        /*-------------------------------------------------*/

        public List LineItems

        {

            // We don't need to set line items, we can use the

            // Add method from the list to add items.

            get { return _lineItems; }

        }

        /*-------------------------------------------------*/

        public Menu()

        {

            // Initialize the list of line items.

            _lineItems = new List();

        }

        /*-------------------------------------------------*/

    }

}
LineItem.cs
using System;

using System.Collections.Generic;

using System.Text;
namespace RemoteSharedLib

{

    [Serializable()]

    public class LineItem

    {

        /*-------------------------------------------------*/

        private string _itemName;

        private double _itemPrice;

        /*-------------------------------------------------*/

        public string ItemName

        {

            get { return _itemName; }

            set { _itemName = value; }

        }

        /*-------------------------------------------------*/

        public double ItemPrice

        {

            get { return _itemPrice; }

            set { _itemPrice = value; }

        }

        /*-------------------------------------------------*/

        public LineItem()

        {
        }

        /*-------------------------------------------------*/

        public override string ToString()

        {

            return _itemName + " - $" + _itemPrice.ToString();

        }

        /*-------------------------------------------------*/

    }

}
These classes could easily be in the same file, it’s more personal preference that I separate them. The important thing to notice though is that both of these classes are marked as being serializable. It is very important that they be marked this way, otherwise you won’t be able to transfer them between client and server. Also, if you are wondering why I chose to override the ToString() method in LineItem, I did it because I will be adding line items to a listbox at the end and I wanted to format how it would show up.
Client Interface
The next step is to get started on the client interface. Add a new class library project to the solution, I called mine RemoteClient. Delete the class that comes with this type of project, and then add an interface to the project. The reason we add an interface is so that the client knows what methods exist on our remote object. Our object on the server will implement this interface. There is a good reason why we use an interface here. We only want the client to know what methods are available, so we can’t add a reference to the remote implementation library, or they wouldn’t even need to use remoting to access the object since a local copy would be deployed. Since this class library will be distributed to the client, we only want to give them what they need. (and not more) Make sense?
We will have to add a reference to our shared library to this project too, because our client is going to need to know how to define the 2 classes we made in the first step. Our interface looks like this when we’re done:
ILoadMenu.cs
using System;

using System.Collections.Generic;

using System.Text;
using RemoteSharedLib;
namespace RemoteClient

{

    public interface ILoadMenu

    {

        /*-------------------------------------------------*/

        Menu LoadMenu();

        /*-------------------------------------------------*/

    }

}
Our interface defines 1 function, LoadMenu(). This function doesn’t take any parameters, and returns a Menu object.
Server Implementation
The server is where the remote object is defined. This is where we will start to use the remoting framework that is available. Add a new class library to the solution, I called it RemoteServer. Rename the class that is created to MenuManager.cs, this will be our remote object. The first thing we need to do is add “using” statements to the following 3 namespaces:
System.Runtime.Remoting
System.Runtime.Remoting.Channels
System.Runtime.Remoting.Channels.Tcp
One thing I should point out, you will not be able to include the System.Runtime.Remoting.Channels.Tcp namespace until you physically add a reference to the System.Runtime.Remoting library in the project. This seems to be a common question, so I want to make sure I don’t forget to mention it. The next important thing to point out is that our MenuManager object inherits from the abstract base class MarshalByRefObject. This is required for an object to be available across application domains. Lastly, our class implements the ILoadMenu interface that we created in the previous step. This is necessary so that the client’s definition of the methods that are available matches those of the remote object. This is what our server object looks like:
MenuManager.cs
using System;

using System.Collections.Generic;

using System.Runtime.Remoting;

using System.Runtime.Remoting.Channels;

using System.Runtime.Remoting.Channels.Tcp;

using System.Text;
using RemoteClient;

using RemoteSharedLib;
namespace RemotingDemo

{

   public class MenuManager : MarshalByRefObject, ILoadMenu

   {

      /*-------------------------------------------------*/

      // This method implements the ILoadMenu interface.

      public Menu LoadMenu()

      {

         LineItem item;

         Menu myMenu = new Menu();
         // We are going to build our menu.  In a real world

         // application these could be driven by a database,

         // or by an XML file, etc.  The point is that the client

         // doesn't know how it gets populated, and it doesn't

         // care.
         item = new LineItem();

         item.ItemName = "Bacon Cheeseburger";

         item.ItemPrice = 8.99;

         myMenu.LineItems.Add(item);
         item = new LineItem();

         item.ItemName = "Chicken Tenders";

         item.ItemPrice = 7.59;

         myMenu.LineItems.Add(item);
         item = new LineItem();

         item.ItemName = "Filet Mignon";

         item.ItemPrice = 24.99;

         myMenu.LineItems.Add(item);
         item = new LineItem();

         item.ItemName = "Fajita Burrito";

         item.ItemPrice = 6.49;

         myMenu.LineItems.Add(item);
         item = new LineItem();

         item.ItemName = "Large Pizza";

         item.ItemPrice = 12.79;

         myMenu.LineItems.Add(item);
         return myMenu;

      }

      /*-------------------------------------------------*/

   }

}
Windows Service
Our next step is to create a windows service that will listen for our remoting requests on the server and pass them along to the object implementation. A windows service makes sense for this because it will be something that is continuously running in the background to handle client requests. Add a windows service project to the solution, I called mine RemoteDemoService. Rename the file from Service1.cs to RemoteDemoService.cs and we’ll be ready to go. You will need to add the same 3 references that we used before concerning remoting, and remember to add a reference to the System.Runtime.Remoting library. We will also need to add a reference to our client as well as our shared library projects. To keep things simple, we are going to just override the OnStart method of the service and put the code to handle our remoting there. I’m going to kind of go fast when talking about this service, if you’ve never created a windows service before and would like more information, then Google is your friend.
For this remoting example, I chose to use the TCP transport channel over the HTTP one, and I just chose a port that is generally not assigned to use. The next step is to register the channel, and then register the service type for the remote object. I chose to use the SingleCall mode, which means that the lifetime of the remote object is only for the duration of the client call. Another option here would be to use the Singleton mode, which means that the state of the remote object would be shared across all client calls. Here is what the code to the windows service looks like:
RemoteDemoService.cs
using System;

using System.Collections.Generic;

using System.ComponentModel;

using System.Data;

using System.Diagnostics;

using System.Runtime.Remoting;

using System.Runtime.Remoting.Channels;

using System.Runtime.Remoting.Channels.Tcp;

using System.ServiceProcess;

using System.Text;
using RemoteServer;
namespace RemoteDemoService

{

    public partial class RemoteDemoService : ServiceBase

    {

        /*-------------------------------------------------*/

        public RemoteDemoService()

        {

            InitializeComponent();

        }

        /*-------------------------------------------------*/

        protected override void OnStart(string[] args)

        {

            TcpServerChannel channel;
            // Register the TCP channel, I just chose an

            // arbitrary TCP port

            channel = new TcpServerChannel(9250);
            // Register our channel.

            ChannelServices.RegisterChannel(channel, true);
            // Set up the object binding and behavior.

            RemotingConfiguration.RegisterWellKnownServiceType

                        (typeof(MenuManager), "MenuManager",

                        WellKnownObjectMode.SingleCall);

        }

        /*-------------------------------------------------*/

        protected override void OnStop()

        {
        }

        /*-------------------------------------------------*/

    }

}
The next step is to add an installer to the RemoteDemoService project. The easiest way to do that is to go into design view for the service file, right click anywhere on the design screen, and choose “Add Installer”. On the ProjectInstaller design screen, you will see 2 components, a ServiceProcessInstaller and a ServiceInstaller, we need to change a few properties on our instances of these. On the ServiceProcessInstaller, we need to change the account property to be LocalSystem. This is the account we want the service running as. On the ServiceInstaller, you can fill out the Description, DisplayName, and ServiceName fields, and you can change the StartType to Automatic if you want. This propery determines how the service is started in windows.
Now the service needs to be installed on the server. You can do this using the Visual Studio 2005 command prompt. Open that and navigate to the directory that has the RemoteDemoService executable, which is probably somewhere under your bin directory of the RemoteDemoService project. Then run this command to install the service: (be sure to change the name of the executable to whatever the name of your service is)
installutil RemoteDemoService.exe
You can uninstall the service at any time by using the /u switch, like this:
installutil /u RemoteDemoService.exe
You should now be able to see your service in the Services control panel in Windows. From there, you can start and stop your new service just like any other windows service.
Client Interface
The last piece we need is the client piece to test out our remoting example. I just put together a quick forms application to test this, I’ll go over just the relevent code here. On your client, you will need to add references to the client library for the interface, and the shared library for the object definitions. You will also need to use our standard 3 remoting namespaces. (with a reference to the System.Runtime.Remoting library)
private void btnLoadMenu_Click(object sender, EventArgs e)

{

    TcpChannel channel;

    ILoadMenu menuManager;

    RemoteSharedLib.Menu currentMenu;
    // Register the TCP channel to use the remote object.

    channel = new TcpChannel();

    ChannelServices.RegisterChannel(channel, true);
    // Use remoting to get an instance of the menu object.

    menuManager = (ILoadMenu)Activator.GetObject(typeof(ILoadMenu),

                          "tcp://localhost:9250/MenuManager");
    // Make sure we got an object back

    if (menuManager == null)

        throw new Exception("Remote object call failed.");
    // Load the menu from the remote object.

        currentMenu = menuManager.LoadMenu();
    // Fill out the list box with the current menu items.

    lbMenu.Items.Clear();

    foreach(LineItem item in currentMenu.LineItems)

    {

        lbMenu.Items.Add(item);

    }
    // Unregister the channel.

    ChannelServices.UnregisterChannel(channel);

}
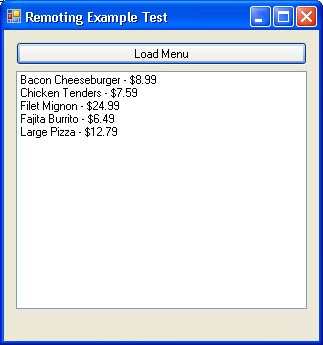
Here is a screenshot of our client after making the remote call.
Conclusion
I hope this short example gave you an idea of how remoting works. I created a .zip file of the project I was using to create this example, you can download it here. This is just a scratch on the surface of the subject of remoting, I didn’t talk about client activated objects, or do any asynchronous operations, but hopefully this will get you started on the subject. If there is any interest maybe I can do another article covering additional subjects.

December 12th, 2006 at 4:02 pm
.NEt – Remoting…
You’ve been kicked (a good thing) – Trackback from DotNetKicks.com…
December 13th, 2006 at 11:31 am
Doesn’t the new windows communication framework (formerly indigo) known as WCF I thing, make this obsolete? I was under the impression that .Net 3.0 included an API that sort of deprecated all the old remoting stuff.
December 13th, 2006 at 11:48 am
You bring up a good point. I’m not sure I’d go so far as to say remoting was obsolete just yet, but WCF does look to be the eventual replacement to remoting, as well as web services as we know them.
Unfortunately, I haven’t had much time to play with WCF yet, I’m going to give it a spin as soon as I can. Maybe I’ll post an article doing the same example in WCF to see the differences.
January 14th, 2007 at 10:41 am
Links (12/13/2006)…
.NET, C#, VB.NET Interview with Rocky Lhotka A small and elegant bruteforcing class **** Implementing…
June 13th, 2011 at 3:44 pm
do you have the same example as the Windows Service, but having a configuration file??
I do this question because I tried an example with a configuration file in the windows service and didn’t work. But your example putting the tpcChannel and the port number in the “OnStart” function does work.
Thanks in advance
June 14th, 2011 at 3:48 pm
No, unfortunately I don’t. I don’t even have this example sitting around any more to be honest with you, lost a few hard drives between this post and now.
When you say that it didn’t work….what exactly is happening?